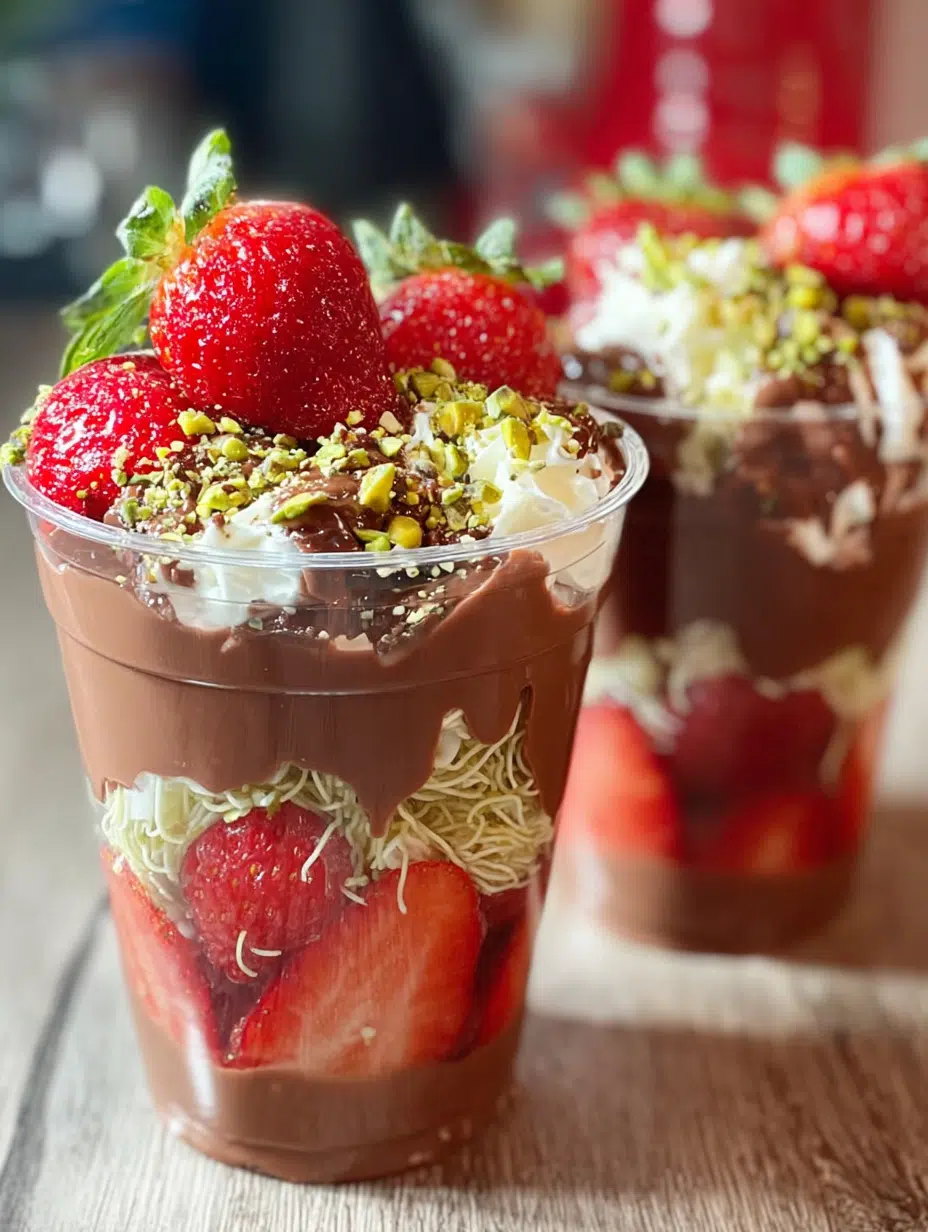
Ingredients for Strawberry Pistachio Chocolate Cups
Let’s gather our ingredients for these delightful Strawberry Pistachio Chocolate Cups! Each component plays a vital role in creating that perfect balance of flavors and textures.
- Milk or Dark Chocolate: This is the star of the show! Choose your favorite type for a rich, creamy base.
- Fresh Strawberries: Sweet and juicy, they add a burst of freshness. Halve or slice them for a beautiful presentation.
- Kataifi Pastry: This optional ingredient brings a unique crunch. If you can’t find it, shredded phyllo or even crushed cookies work well too!
- Whipped Cream: Sweetened whipped cream adds a light, airy layer. You can make your own or use store-bought for convenience.
- Pistachios: Chopped pistachios provide a nutty crunch and a pop of color. They’re also a great source of healthy fats!
- Whole Strawberries: These are for garnish, giving your cups a stunning finish that’s sure to impress.
For exact measurements, check the bottom of the article where you can find everything listed for easy printing. Now, let’s get ready to create some magic in the kitchen!
How to Make Strawberry Pistachio Chocolate Cups
Now that we have our ingredients ready, let’s dive into the fun part—making these Strawberry Pistachio Chocolate Cups! Follow these simple steps, and you’ll be on your way to a delicious dessert that’s sure to impress.
Step 1: Melt the Chocolate
Start by melting your chocolate. You can use a double boiler for this, which is my preferred method. Just fill a pot with water, bring it to a simmer, and place a heatproof bowl on top. Add your chocolate and stir until it’s smooth and glossy. If you’re short on time, the microwave works too! Just heat it in 20-second intervals, stirring in between to avoid burning. Remember, patience is key here!
Step 2: Prepare the Cups
Once your chocolate is melted, it’s time to prepare the cups. Pour a spoonful of the melted chocolate into each cup. Use the back of a spoon to swirl it around, coating the bottom and sides evenly. This creates a lovely shell for your dessert. Let it set slightly at room temperature while you move on to the next step.
Step 3: Add Strawberries
Now for the fun part—adding the strawberries! Take your halved strawberries and gently press them against the inside walls of the chocolate cups. This not only looks beautiful but also adds a burst of flavor with every bite. Make sure to arrange them nicely for that layered look!
Step 4: Incorporate Crunch
To add some texture, sprinkle a small handful of shredded kataifi pastry into each cup. This gives a delightful crunch that contrasts beautifully with the smooth chocolate and creamy layers. If you can’t find kataifi, don’t worry! Shredded phyllo or even crushed cookies work just as well.
Step 5: Layer with Whipped Cream
Next, it’s time to add a layer of whipped cream. You can either pipe it in for a fancy touch or simply spoon it over the pastry layer. This light, airy layer adds a wonderful creaminess that balances the richness of the chocolate. Don’t be shy—make it a generous layer!
Step 6: Final Chocolate Layer
Now, pour more melted chocolate over the whipped cream to cover and bind all the layers together. This will create a beautiful, cohesive dessert. Make sure to smooth it out so it looks nice and even. You want every bite to be a perfect blend of flavors!
Step 7: Garnish and Chill
Finally, it’s time to garnish! Add some swirls of whipped cream on top, sprinkle with chopped pistachios for that nutty crunch, and place a whole fresh strawberry in the center for a stunning finish. Now, pop your cups in the refrigerator for about 20–30 minutes to let everything set. Trust me, the wait will be worth it!
