admin
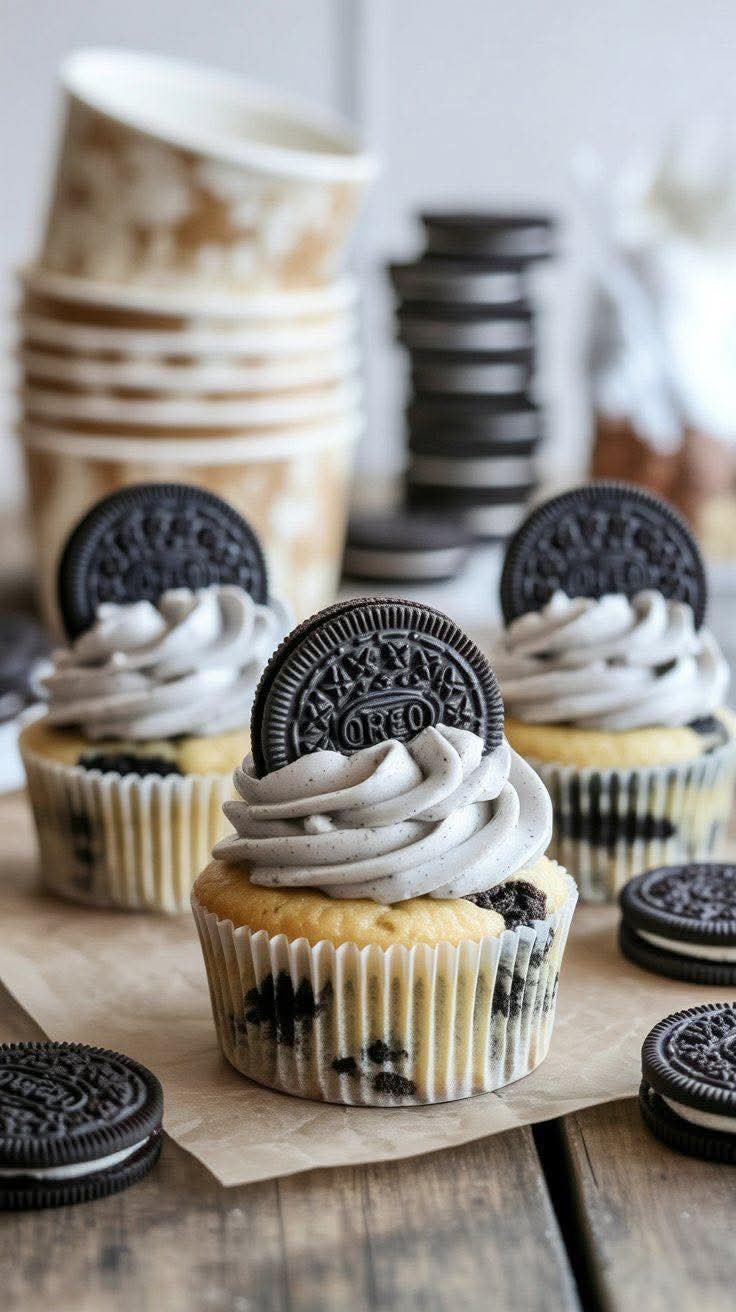
Ingredients for Cookies & Cream Pudding Cups
Let’s gather our ingredients for these delightful Cookies & Cream Pudding Cups. Each component plays a vital role in creating that creamy, dreamy experience we all crave. Here’s what you’ll need:
- Instant vanilla pudding mix: This is the star of the show, providing that rich, creamy base.
- Cold milk: Essential for mixing with the pudding to achieve the perfect consistency. Whole milk gives a richer flavor, but feel free to use your favorite alternative.
- Whipped topping: Whether you choose Cool Whip or homemade whipped cream, this adds a light, fluffy texture that balances the pudding.
- Oreo cookies: The classic chocolate sandwich cookies bring that iconic cookies and cream flavor. You’ll need both crushed and whole cookies for the base and garnish.
- Melted butter: This helps bind the crushed Oreos together, creating a delicious crust at the bottom of each cup.
- Whipped cream (for garnish): A dollop on top makes everything look and taste even better!
- Extra Oreo cookies: Use these for decoration—whole ones for a cute touch and crushed ones for that extra crunch.
How to Make Cookies & Cream Pudding Cups
Now that we have our ingredients ready, let’s dive into the fun part—making these Cookies & Cream Pudding Cups! Follow these simple steps, and you’ll have a delicious dessert in no time.
Step 1: Prepare the Oreo Base
First things first, let’s create that scrumptious Oreo base. In a bowl, mix the crushed Oreos with melted butter until everything is well combined. The butter acts like a glue, holding those crunchy bits together. Once mixed, take about 2–3 tablespoons of this mixture and press it firmly into the bottom of each cup. This will form a delightful crust that sets the stage for the creamy goodness to come!
Step 2: Make the Pudding Mixture
Next up, it’s time to make the pudding! In a separate bowl, whisk together the instant vanilla pudding mix and cold milk. Keep whisking until the mixture thickens up nicely. This step is crucial because it gives our Cookies & Cream Pudding Cups that rich, velvety texture we all love. It should take just a couple of minutes, so don’t rush—enjoy the process!
Step 3: Fold in Whipped Topping
Now, let’s add some fluffiness to our pudding! Gently fold in the whipped topping into the thickened pudding mixture. Use a spatula and be careful not to deflate the whipped cream too much. This step is what makes the pudding light and airy, creating a perfect balance with the dense Oreo crust.
Step 4: Add Crushed Oreos
For that authentic cookies and cream flavor, it’s time to stir in the crushed Oreos. This adds a delightful texture and extra chocolatey goodness to the pudding. Just fold them in gently, ensuring they’re evenly distributed throughout the mixture. Trust me, this is where the magic happens!
Step 5: Assemble the Cups
Now comes the fun part—assembling our Cookies & Cream Pudding Cups! Spoon the pudding mixture over the Oreo crust in each cup. Make sure to smooth the tops for a nice finish. You want each cup to look as good as it tastes, so take your time with this step. It’s all about presentation!
Step 6: Chill and Garnish
Finally, it’s time to let these beauties chill in the refrigerator for at least an hour. This allows the flavors to meld together beautifully. Once they’re chilled, it’s time to garnish! Top each cup with a dollop of whipped cream, sprinkle some crushed Oreos on top, and add a whole cookie for that extra flair. Your Cookies & Cream Pudding Cups are now ready to impress!
Ingredients for Korean BBQ Meatballs
Gathering the right ingredients is the first step to creating these mouthwatering Korean BBQ Meatballs. Here’s what you’ll need:
- Ground beef: The star of the show! You can also use a mix of beef and pork for added flavor.
- Breadcrumbs: Panko is my go-to for that extra crunch, but regular breadcrumbs work too.
- Egg: This binds everything together, ensuring your meatballs hold their shape.
- Green onions: Fresh and vibrant, they add a lovely crunch and flavor. Save some for garnish!
- Garlic: Minced garlic brings a punch of flavor that’s hard to resist.
- Ginger: Grated ginger adds warmth and a hint of spice, elevating the dish.
- Soy sauce: This salty goodness is essential for that umami flavor.
- Sesame oil: A drizzle of this nutty oil adds depth and richness to the meatballs.
- Gochujang: This Korean chili paste is optional but highly recommended for a spicy kick!
- Black pepper: A dash of this adds a subtle heat to balance the flavors.
- Brown sugar: Sweetness is key in the sauce, balancing the savory elements beautifully.
- Rice vinegar: This tangy ingredient brightens the sauce and cuts through the richness.
- Honey: A touch of honey enhances the sweetness and gives the sauce a glossy finish.
- Cornstarch: Mixed with water, this thickens the sauce to a perfect consistency.
- Sesame seeds: These are for garnish, adding a delightful crunch and visual appeal.
- Extra green onions: Sliced for garnish, they add freshness and color to your dish.
For exact measurements, check the bottom of the article where you can find everything listed for easy printing. Happy cooking!

How to Make Korean BBQ Meatballs
Now that we have our ingredients ready, let’s get cooking! Making these Korean BBQ Meatballs is a breeze, and I promise you’ll feel like a culinary rockstar. Follow these simple steps, and you’ll have a plate of deliciousness in no time!
Step 1: Prepare the Meatball Mixture
In a large bowl, combine the ground beef, breadcrumbs, egg, minced garlic, grated ginger, soy sauce, sesame oil, gochujang, and black pepper.
Mix gently with your hands or a spoon until everything is just combined.
Be careful not to overmix; otherwise, your meatballs might turn out tough.
Once mixed, roll the mixture into bite-sized meatballs.
Step 2: Cook the Meatballs
Heat a drizzle of oil in a large skillet over medium-high heat.
Once the oil is hot, add the meatballs to the skillet.
Cook them for about 8–10 minutes, turning occasionally, until they are browned on all sides and fully cooked through.
Once done, remove the meatballs from the skillet and set them aside on a plate.
Step 3: Make the Sauce
In the same skillet, add soy sauce, brown sugar, rice vinegar, honey, sesame oil, minced garlic, and grated ginger.
Bring this mixture to a simmer over medium heat, stirring occasionally.
Once it’s bubbling, stir in the cornstarch slurry to thicken the sauce.
Cook until the sauce is thickened and glossy, which should take just a couple of minutes.
Step 4: Coat the Meatballs
Return the cooked meatballs to the skillet.
Toss them gently in the sauce until they are well coated.
Let them simmer in the sauce for a minute or two to soak up all that delicious flavor.
Step 5: Garnish and Serve
Finally, sprinkle the meatballs with sesame seeds and chopped green onions for that extra pop of flavor and color.
Serve them hot with steamed rice, noodles, or as a tasty appetizer.
Ingredients for Hamburger Green Bean Casserole
Gathering the right ingredients is the first step to creating this delightful Hamburger Green Bean Casserole. Here’s what you’ll need:
- Ground beef: The star of the dish, providing a rich, savory flavor. You can substitute with ground turkey or chicken for a lighter option.
- Olive oil or butter: Used for sautéing the onion and garlic, adding a touch of richness. Feel free to use whichever you prefer or have on hand.
- Onion: Diced onion adds sweetness and depth. If you’re short on time, onion powder can be a quick substitute.
- Garlic: Minced garlic brings a wonderful aroma and flavor. Fresh is best, but garlic powder works in a pinch.
- Green beans: Canned or fresh, they add a pop of color and nutrition. Fresh green beans can be steamed for a healthier twist.
- Cream of mushroom soup: This creamy base ties everything together. You can use a homemade version or opt for a gluten-free can if needed.
- Sour cream: Adds creaminess and a slight tang. Greek yogurt can be a great substitute for a healthier option.
- Worcestershire sauce: A splash of this sauce enhances the umami flavor. If you’re out, soy sauce can work as an alternative.
- Onion powder: For an extra layer of flavor, this is a handy ingredient to have in your spice cabinet.
- Salt & black pepper: Essential for seasoning. Adjust to your taste preferences.
- Cheddar cheese: Shredded cheddar adds a deliciously gooey texture. Feel free to mix in your favorite cheese varieties.
- mozzarella cheese: This cheese melts beautifully, creating a lovely topping. You can swap it for provolone or Monterey Jack if desired.
- Crispy fried onions: These add a delightful crunch on top. You can find them in stores or make your own for a homemade touch.
For exact measurements, check the bottom of the article where you can find everything listed for easy printing!
How to Make Hamburger Green Bean Casserole
Now that you have all your ingredients ready, let’s dive into making this delightful Hamburger Green Bean Casserole. Follow these simple steps, and you’ll have a comforting meal that’s sure to please everyone at the table!
Step 1: Prepare the Base
Start by heating your olive oil or butter in a large skillet over medium heat. Once it’s hot, toss in the diced onion and minced garlic. Sauté them until they’re fragrant and the onion turns translucent. This step is crucial; it builds the flavor foundation for your casserole.
Step 2: Cook the Ground Beef
Next, add the ground beef to the skillet. Season it with salt, black pepper, and onion powder. Cook until the beef is browned and no longer pink. Remember to drain any excess fat to keep your casserole from becoming greasy. This step ensures a hearty yet balanced dish.
Step 3: Mix the Creamy Filling
In a large mixing bowl, combine the cream of mushroom soup, sour cream, and Worcestershire sauce. Stir in half of the shredded cheddar and mozzarella cheese. This creamy filling is what makes the Hamburger Green Bean Casserole so comforting. It’s like a warm hug in a bowl!
Step 4: Combine Ingredients
Now, gently fold in the cooked ground beef and drained green beans into the creamy mixture. Make sure everything is well coated. This is where the magic happens, as all those flavors meld together beautifully. It’s a colorful and inviting mixture that’s hard to resist!
Step 5: Bake the Casserole
Preheat your oven to 375°F (190°C). Spread the combined mixture evenly into a greased 9×13-inch baking dish. Top it with the remaining cheese, creating a gooey layer that will melt into perfection. Bake uncovered for about 25 minutes, or until it’s bubbly and the cheese is melted. Your kitchen will smell heavenly!
Step 6: Add the Crispy Topping
Finally, sprinkle the crispy fried onions on top of the casserole. Pop it back in the oven for an additional 5 to 7 minutes, until the onions are golden brown and crunchy. This final touch adds a delightful crunch that contrasts beautifully with the creamy filling. Let it rest for about 5 minutes before serving, and enjoy!
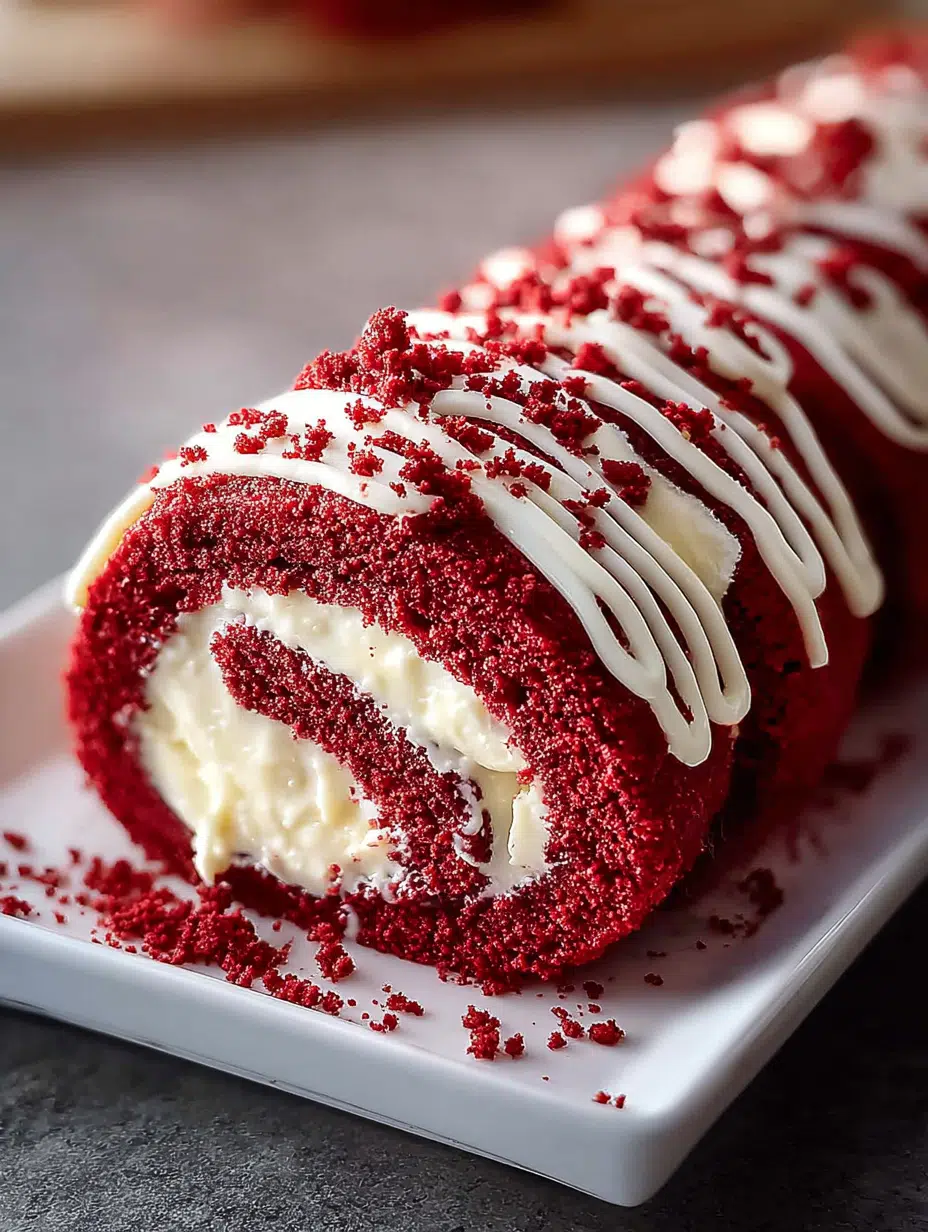
Ingredients for Red Velvet Cake Roll with Cream Cheese Filling
Gathering the right ingredients is the first step to creating your stunning Red Velvet Cake Roll with Cream Cheese Filling. Here’s what you’ll need:
- All-purpose flour: This is the backbone of your cake, providing structure and texture.
- Unsweetened cocoa powder: Just a touch adds depth to the flavor without overpowering the sweetness.
- Baking powder: This helps the cake rise, giving it that light and airy feel.
- Baking soda: A little boost for the cake, ensuring it’s fluffy and tender.
- Salt: Enhances the flavors and balances the sweetness.
- Large eggs: They bind everything together and add moisture.
- Granulated sugar: Sweetness is key! It also helps with the cake’s texture.
- Vegetable oil: Keeps the cake moist and tender, making each bite melt in your mouth.
- Vanilla extract: A splash of this adds warmth and enhances the overall flavor.
- Distilled white vinegar: This reacts with the baking soda, helping the cake rise beautifully.
- Buttermilk: Adds a tangy flavor and keeps the cake moist.
- Red food coloring: The star of the show! It gives the cake its signature vibrant hue.
- Cream cheese: The creamy filling that makes this dessert irresistible.
- Powdered sugar: Sweetens the filling and gives it a smooth texture.
- Unsalted butter: Adds richness to the filling, making it even more decadent.
- Whipped cream (optional): For a lighter, fluffier filling, fold in some whipped cream.
- White chocolate drizzle: A beautiful finishing touch that adds sweetness and elegance.
- Red velvet crumbs: Perfect for decoration, adding a pop of color and texture.
How to Make Red Velvet Cake Roll with Cream Cheese Filling
Now that you have all your ingredients ready, let’s dive into the fun part: making this stunning Red Velvet Cake Roll with Cream Cheese Filling! Follow these simple steps, and you’ll be on your way to creating a dessert that will wow everyone.
Step 1: Preheat and Prepare
First things first, preheat your oven to 350°F (175°C). While it warms up, grab a 10×15-inch jelly roll pan and line it with parchment paper. This will help your cake roll out smoothly later on. Trust me, you don’t want to skip this step!
Step 2: Mix Dry Ingredients
In a medium bowl, sift together the all-purpose flour, cocoa powder, baking powder, baking soda, and salt. Sifting is key here; it helps to aerate the flour and ensures a light, fluffy cake. Plus, it’s a great way to get rid of any lumps!
Step 3: Combine Wet Ingredients
In another bowl, beat the eggs and granulated sugar together until the mixture is pale and fluffy. This usually takes about 3-5 minutes. Then, add in the vegetable oil, vanilla extract, distilled white vinegar, buttermilk, and red food coloring. Mix until everything is well combined. The vibrant color will make your heart sing!
Step 4: Combine Mixtures
Now, gently fold the dry ingredients into the wet mixture. Use a spatula and be careful not to overmix. You want a smooth batter, but a few lumps are okay. This is where the magic begins, as the colors and flavors meld together!
Step 5: Bake the Cake
Spread the batter evenly into your prepared pan. Bake for 12-14 minutes, or until the cake springs back when lightly touched. Keep an eye on it; you want it to be just right, not overbaked!
Step 6: Roll the Cake
Once baked, remove the cake from the oven and immediately invert it onto a clean kitchen towel dusted with powdered sugar. Peel off the parchment paper gently. While it’s still warm, roll the cake up with the towel from the short end. This helps it hold its shape. Let it cool completely in this rolled position.
Step 7: Prepare the Filling
While the cake cools, let’s whip up that delicious cream cheese filling! In a mixing bowl, beat the softened cream cheese, unsalted butter, powdered sugar, and vanilla extract until smooth and creamy. If you want a lighter texture, fold in some whipped cream at this stage. It’s like a cloud of happiness!
Step 8: Fill and Roll
Once the cake is completely cool, gently unroll it. Spread the cream cheese filling evenly across the surface, leaving a small border around the edges. Then, re-roll the cake tightly without the towel. This is where the magic happens, as you create that beautiful swirl!
Step 9: Chill and Decorate
Chill the rolled cake in the refrigerator for at least an hour. This helps it set and makes slicing easier. When you’re ready to serve, drizzle with melted white chocolate and sprinkle with red velvet crumbs for that extra flair. Slice into rounds, and get ready to enjoy this rich, creamy, and stunning dessert!
Ingredients for Easy Cowboy Casserole
Gathering the right ingredients is the first step to creating this delightful Easy Cowboy Casserole. Here’s what you’ll need:
- Ground beef: The star of the show! It adds a savory depth to the dish.
- Onion: Diced onion brings a sweet and aromatic flavor that enhances the beef.
- Garlic: Minced garlic adds a punch of flavor that’s hard to resist.
- Cream of mushroom soup: This creamy base ties everything together, making it rich and comforting.
- Sour cream: Adds a tangy creaminess that balances the flavors beautifully.
- Cheddar cheese: Shredded cheddar gives that classic cheesy goodness we all love.
- mozzarella cheese: This cheese melts beautifully, creating a gooey topping.
- Tater tots: The crispy crown of this casserole! They add texture and fun to every bite.
- Worcestershire sauce: A splash of this sauce brings a savory umami flavor that elevates the dish.
- Smoked paprika: This spice adds a subtle smokiness that makes the casserole even more delicious.
- Salt & black pepper: Essential for seasoning and enhancing all the flavors.
- Green onions: Sliced for garnish, they add a fresh crunch and a pop of color.
Feel free to get creative! You can toss in some bell peppers or corn for extra flavor and nutrition. If you’re looking for a lighter option, ground turkey or chicken can be great substitutes for beef. And remember, the exact quantities are listed at the bottom of the article for your convenience!
How to Make Easy Cowboy Casserole
Now that we have our ingredients ready, let’s dive into the fun part—making this Easy Cowboy Casserole! Follow these simple steps, and you’ll have a delicious meal on the table in no time.
Step 1: Cook the Beef Mixture
Start by heating a skillet over medium heat. Add the ground beef, diced onion, and minced garlic. Cook until the beef is browned and the onion is soft, about 5-7 minutes. Make sure to stir occasionally to break up the meat. Once it’s cooked, drain any excess fat. This step is crucial for keeping the casserole from becoming greasy!
Step 2: Add Seasonings
Next, stir in the Worcestershire sauce, smoked paprika, salt, and black pepper. These seasonings are the secret to a flavorful Easy Cowboy Casserole. Mix everything well, allowing the spices to coat the beef mixture evenly. The aroma will be irresistible!
Step 3: Create the Creamy Base
Now, it’s time to make it creamy! Add the cream of mushroom soup and sour cream to the skillet. Stir until everything is well combined and creamy. This mixture will be the heart of your casserole, adding richness and depth to every bite.
Step 4: Prepare for Baking
Preheat your oven to 375°F (190°C). While it’s heating, grab a greased 9×13-inch baking dish. Layer the beef mixture evenly across the bottom. This ensures that every scoop of your Easy Cowboy Casserole is packed with flavor!
Step 5: Add Cheese and Tater Tots
Sprinkle half of the shredded cheddar and mozzarella cheese over the beef mixture. Then, arrange the frozen tater tots on top in a single layer. This crispy topping is what makes this casserole so fun and delicious. Trust me, it’s worth the wait!
Step 6: Bake to Perfection
Place the baking dish in the preheated oven and bake uncovered for 35-40 minutes. You’ll know it’s done when the tater tots are golden and crispy. For the final touch, sprinkle the remaining cheese on top and return it to the oven for an additional 5 minutes until melted. Your kitchen will smell heavenly!
Ingredients for Strawberry Cheesecake French Toast Roll-Ups
Gathering the right ingredients is the first step to creating these delightful Strawberry Cheesecake French Toast Roll-Ups. Here’s what you’ll need:
- Sandwich bread: Soft white or brioche works best for a fluffy texture.
- Cream cheese: This is the star of the show, providing that rich, creamy filling.
- Powdered sugar: A touch of sweetness to balance the tanginess of the cream cheese.
- Vanilla extract: Adds a warm, aromatic flavor that enhances the cheesecake taste.
- Fresh strawberries: Diced for a burst of fruity freshness; feel free to add more for garnish!
- Eggs: Essential for the custard-like coating that makes these roll-ups golden and delicious.
- Milk: Helps create a smooth egg mixture for dipping the roll-ups.
- Sugar: A little extra sweetness for the egg mixture, making every bite delightful.
- Cinnamon: This spice adds warmth and a hint of cozy flavor to the roll-ups.
- Butter: For frying, giving the roll-ups that perfect crispy exterior.
For those who want to get creative, you can swap out the strawberries for other fruits like blueberries or raspberries. You can also use flavored cream cheese for an extra twist! Remember, the exact quantities are listed at the bottom of the article for easy printing.
How to Make Strawberry Cheesecake French Toast Roll-Ups
Now that you have all your ingredients ready, let’s dive into the fun part: making these Strawberry Cheesecake French Toast Roll-Ups! Follow these simple steps, and you’ll have a delicious breakfast treat in no time.
Step 1: Prepare the Cheesecake Mixture
Start by grabbing a mixing bowl. In it, beat the softened cream cheese, powdered sugar, and vanilla extract together until the mixture is smooth and creamy. It should feel like a fluffy cloud of sweetness! Next, gently fold in the diced strawberries. This adds a fresh burst of flavor that makes these roll-ups irresistible.
Step 2: Prepare the Bread
Now, let’s get to the bread! Carefully cut the crusts off each slice of bread. This step is crucial for achieving that perfect roll-up shape. Once the crusts are off, take a rolling pin and flatten each slice. You want them to be thin but not torn. Think of it as giving the bread a little spa treatment!
Step 3: Assemble the Roll-Ups
Time to bring it all together! Spread about one tablespoon of the cheesecake mixture onto each flattened slice of bread. Make sure to cover it evenly, leaving a little space at the edges. Now, roll each slice tightly into a log, sealing the edges as you go. This is where the magic happens, so roll with love!
Step 4: Prepare the Egg Mixture
In a shallow bowl, whisk together the eggs and milk until well combined. This mixture will create a delicious custard-like coating for your roll-ups. It’s like giving them a warm bath before they hit the skillet!
Step 5: Coat the Roll-Ups
In another bowl, mix together the sugar and cinnamon. This sweet blend will add a delightful crunch to your roll-ups. Dip each roll in the egg mixture, ensuring it’s fully coated. Then, roll it in the cinnamon-sugar mixture. This step is where the flavor really shines!
Step 6: Cook the Roll-Ups
Heat a skillet over medium heat and add the butter. Once it’s melted and bubbly, carefully place the roll-ups in the skillet. Cook them for about 2–3 minutes on each side, or until they’re golden brown and crispy. The aroma will fill your kitchen, making it hard to resist sneaking a bite!
Ingredients for Cheesy Biscuit & Sausage Gravy Casserole
Gathering the right ingredients is the first step to creating this delightful Cheesy Biscuit & Sausage Gravy Casserole. Here’s what you’ll need:
- Breakfast sausage: This is the star of the show! Choose your favorite brand or even a spicy variety for a kick.
- Butter: Adds richness to the gravy. You can substitute with olive oil if you prefer a lighter option.
- All-purpose flour: This helps thicken the gravy. For a gluten-free version, use a gluten-free flour blend.
- Whole milk: Warm milk creates a creamy texture. You can use low-fat milk or a dairy-free alternative if needed.
- Garlic powder: A must for flavor! Fresh garlic can be used for a more robust taste.
- Onion powder: This adds depth to the gravy. Fresh onions can be sautéed for a fresher flavor.
- Black pepper: A pinch of pepper enhances the overall taste. Adjust to your spice preference.
- Salt: Essential for seasoning. Always taste and adjust to your liking.
- Refrigerated biscuit dough: The base of this casserole. You can also make homemade biscuits for a personal touch.
- Shredded cheddar cheese: This brings the cheesy goodness! Feel free to mix in other cheeses like Monterey Jack for variety.
- Chopped parsley: A fresh garnish that adds color and a hint of flavor. You can skip it if you’re in a hurry.
How to Make Cheesy Biscuit & Sausage Gravy Casserole
Now that you have all your ingredients ready, let’s dive into the fun part—making this Cheesy Biscuit & Sausage Gravy Casserole! Follow these simple steps, and you’ll have a delicious breakfast ready in no time.
Step 1: Brown the Sausage
Start by heating a skillet over medium heat. Add the breakfast sausage and cook it until it’s browned and fully cooked. The aroma will fill your kitchen, and trust me, it’s heavenly! Use a slotted spoon to remove the sausage and set it aside. Leave about 2–3 tablespoons of the drippings in the pan; this will add flavor to your gravy.
Step 2: Make the Gravy
In the same skillet, toss in the butter and let it melt. Once melted, stir in the flour and cook for 1–2 minutes. This creates a roux, which is the base of your gravy. Gradually whisk in the warm milk, stirring constantly until the mixture thickens. It should be smooth and creamy. Season it with garlic powder, onion powder, salt, and black pepper. Then, stir the cooked sausage back into the gravy. Your kitchen will smell like a breakfast paradise!
Step 3: Prepare the Baking Dish
Preheat your oven to 375°F (190°C). While it’s heating, grab a 9×13-inch baking dish and give it a good greasing with cooking spray or butter. This will prevent sticking and make cleanup easier. Pour the sausage gravy into the prepared dish, spreading it evenly across the bottom.
Step 4: Assemble the Casserole
Now comes the fun part! Sprinkle half of the shredded cheddar cheese over the gravy. Next, take your refrigerated biscuit dough and cut it into halves or quarters. Arrange the biscuit pieces over the gravy, making sure they’re evenly spaced. Finally, sprinkle the remaining cheese on top. This will create a gooey, cheesy layer that everyone will love!
Step 5: Bake to Perfection
Pop the casserole into your preheated oven and bake it uncovered for 25–30 minutes. You’ll know it’s ready when the biscuits are golden brown and cooked through. The cheese will be bubbly and inviting. Once it’s out of the oven, let it cool for a few minutes. Garnish with fresh parsley for a pop of color, and then serve warm. Enjoy every cheesy, savory bite!
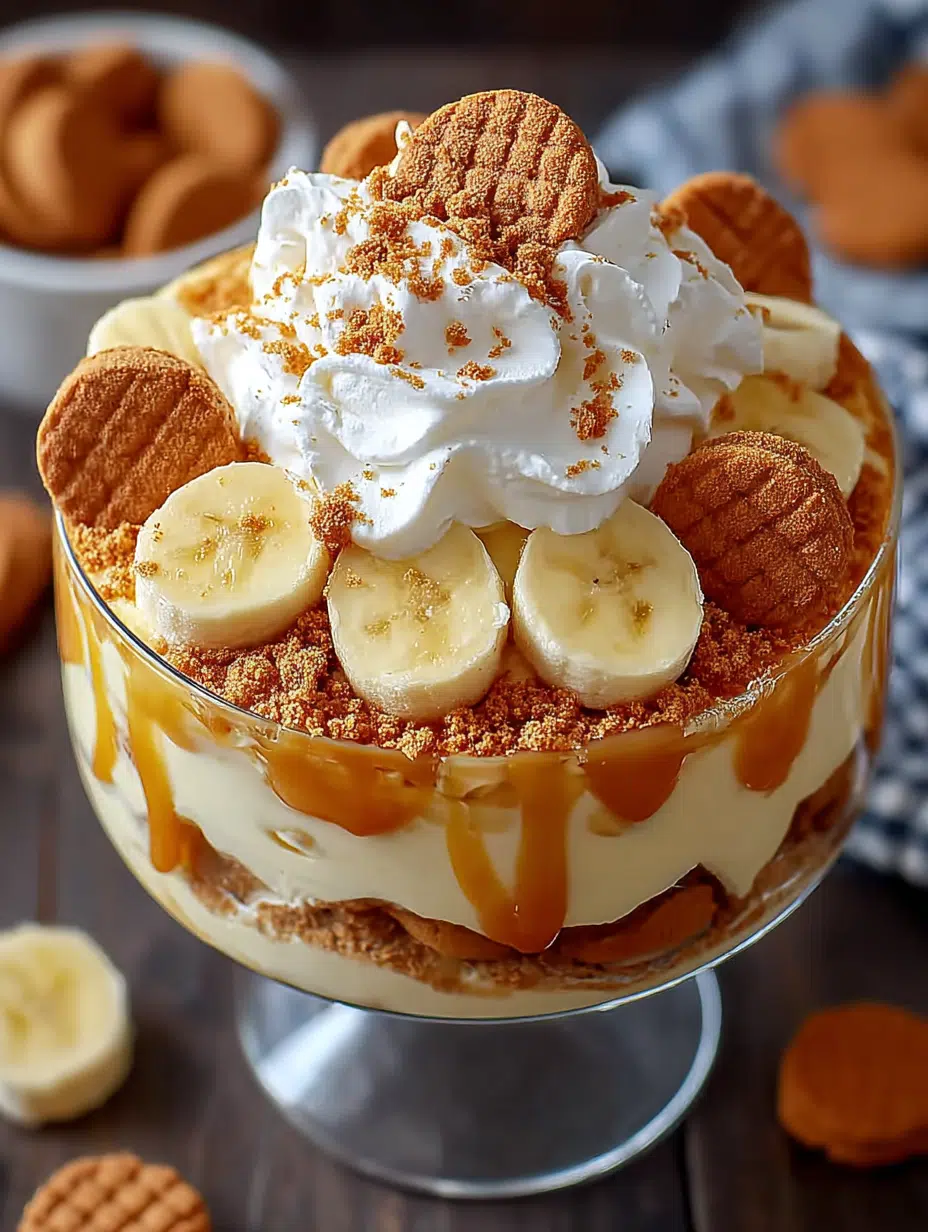
Ingredients for Biscoff Banana Caramel Pudding Cups
Let’s gather our ingredients for these scrumptious Biscoff Banana Caramel Pudding Cups! Each component plays a vital role in creating that perfect balance of flavors and textures.
- Cold milk: This is the base for our pudding. It adds creaminess and helps the pudding mix thicken.
- Instant vanilla pudding mix: This magical powder transforms milk into a luscious pudding in no time. It’s the heart of our dessert!
- Heavy cream: Whipping this into soft peaks adds a light, airy texture to the pudding. You can also use whipped topping for convenience.
- Caramel sauce: A sweet drizzle of caramel elevates the flavor. You can use store-bought or homemade for a richer taste.
- Ripe bananas: These sweet gems add natural sweetness and a lovely texture. Make sure they’re ripe for the best flavor!
- Biscoff cookies: The star of the show! These crunchy cookies bring a delightful spice and crunch to each layer.
- Whipped cream: A dollop on top adds a creamy finish. It’s like the cherry on top, but even better!
- Crushed Biscoff cookies: For garnish, these add an extra crunch and a pop of flavor to your pudding cups.
How to Make Biscoff Banana Caramel Pudding Cups
Now that we have our ingredients ready, let’s dive into the fun part—making these Biscoff Banana Caramel Pudding Cups! Follow these simple steps, and you’ll have a delicious dessert that’s sure to impress.
Step 1: Prepare the Pudding Mixture
Start by whisking together cold milk and instant vanilla pudding mix in a bowl. Keep whisking until the mixture thickens. This creamy base is the heart of your dessert, so make sure it’s nice and smooth!
Step 2: Fold in Whipped Cream
Next, gently fold in the whipped cream or whipped topping. This step adds a light, fluffy texture to the pudding. Be careful not to deflate it; we want that airy goodness to shine through!
Step 3: Layer the Biscoff Cookies
In individual cups or a trifle dish, start with a layer of crushed Biscoff cookies. This crunchy layer adds a delightful texture that contrasts beautifully with the creamy pudding.
Step 4: Add Pudding and Bananas
Spoon in the pudding mixture over the cookie layer. Then, add a layer of sliced ripe bananas. Their natural sweetness complements the pudding perfectly, making each bite a little slice of heaven.
Step 5: Drizzle with Caramel Sauce
Now, it’s time to add a generous drizzle of caramel sauce. This sweet addition enhances the flavor profile and ties all the layers together. Don’t be shy—go for it!
Step 6: Repeat the Layers
Continue layering until the cups are full. Alternate between the pudding, bananas, and crushed Biscoff cookies. This ensures a delightful mix of flavors in every bite, making your Biscoff Banana Caramel Pudding Cups irresistible!
Step 7: Finish with Toppings
Top your cups with a dollop of whipped cream. You can also add whole or halved Biscoff cookies for that extra touch. Finally, sprinkle some crushed cookies on top for a crunchy garnish. It’s all about those finishing touches!
Step 8: Chill Before Serving
Last but not least, refrigerate your pudding cups for at least 2 hours. This chilling time allows the flavors to meld together beautifully. Trust me, the wait will be worth it!
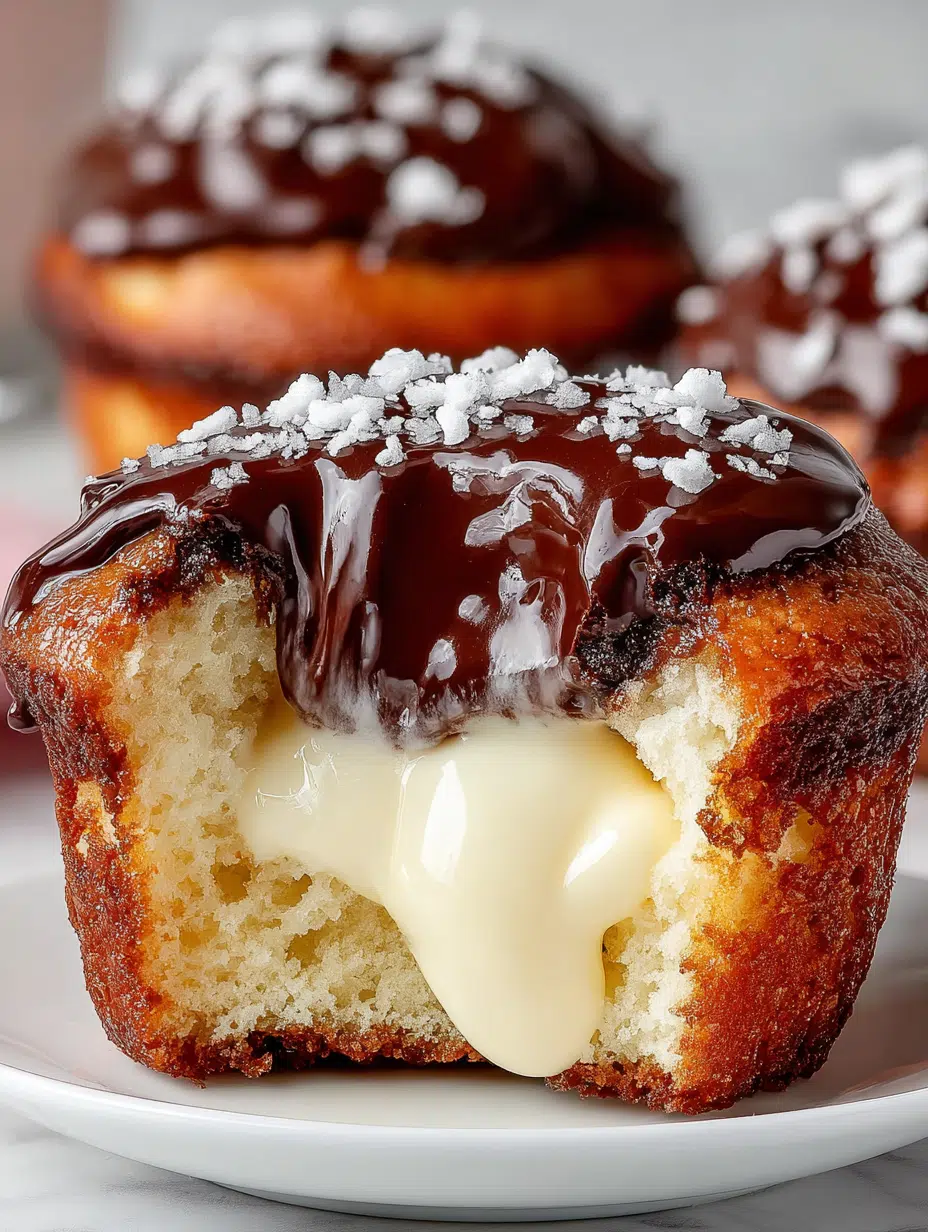
Ingredients for Boston Cream Pie Cupcakes
Gathering the right ingredients is the first step to creating these scrumptious Boston Cream Pie Cupcakes. Here’s what you’ll need:
- All-purpose flour: This is the backbone of your cupcakes, giving them structure and fluffiness.
- Baking powder: A leavening agent that helps the cupcakes rise, making them light and airy.
- Salt: Just a pinch enhances the flavors and balances the sweetness.
- Unsalted butter: Softened butter adds richness and moisture to the batter.
- Granulated sugar: Sweetens the cupcakes and contributes to their tender texture.
- Eggs: They provide structure and stability, helping the cupcakes hold their shape.
- Vanilla extract: A must-have for that warm, comforting flavor that pairs beautifully with the other ingredients.
- Milk: Adds moisture and helps create a tender crumb in the cupcakes.
- Whole milk (for pastry cream): This creamy base is essential for making the silky custard filling.
- Sugar (for pastry cream): Sweetens the custard, making it a delightful surprise inside the cupcakes.
- Egg yolks (for pastry cream): They enrich the custard, giving it a luscious texture.
- Cornstarch (for pastry cream): Thickens the custard, ensuring it holds its shape when piped into the cupcakes.
- Unsalted butter (for pastry cream): Adds a velvety richness to the filling.
- Vanilla extract (for pastry cream): Enhances the flavor of the custard, making it even more delicious.
- Semisweet chocolate chips (or chopped chocolate): The star of the ganache, providing that rich chocolatey topping.
- Heavy cream (for ganache): Creates a smooth and glossy finish for the cupcakes.
How to Make Boston Cream Pie Cupcakes
Step 1: Preheat and Prepare
First things first, preheat your oven to 350°F (175°C). While that’s heating up, line a muffin tin with cupcake liners. This little step is crucial, as it keeps your cupcakes from sticking and makes cleanup a breeze. Trust me, you’ll thank yourself later!
Step 2: Mix Dry Ingredients
In a medium bowl, whisk together the all-purpose flour, baking powder, and salt. This dry mixture is the foundation of your Boston Cream Pie Cupcakes. Mixing these ingredients well ensures that the baking powder is evenly distributed, leading to perfectly risen cupcakes!
Step 3: Cream Butter and Sugar
In a separate bowl, beat the softened unsalted butter and granulated sugar until fluffy. This should take about 2-3 minutes. Then, add in the eggs and vanilla extract. The mixture should be light and airy, creating a delightful base for your cupcakes. It’s like a sweet cloud!
Step 4: Combine Mixtures
Now, it’s time to bring it all together! Alternate adding the dry ingredients and milk to the butter mixture. Start with a third of the dry mix, then half the milk, and repeat until everything is combined. This method keeps your batter smooth and prevents lumps. Easy peasy!
Step 5: Bake the Cupcakes
Fill each cupcake liner about three-quarters full with the batter. Bake in your preheated oven for 18-20 minutes, or until a toothpick inserted comes out clean. The aroma wafting through your kitchen will be heavenly, and you’ll be counting down the minutes!
Step 6: Make the Pastry Cream
While the cupcakes are baking, heat the whole milk in a saucepan until it’s steaming but not boiling. In a separate bowl, whisk together the egg yolks, sugar, and cornstarch until pale. Gradually temper the egg mixture with the hot milk, then return it to the saucepan and cook until thickened. This creamy filling is the heart of your cupcakes!
Step 7: Prepare the Ganache
For the ganache, heat the heavy cream until it simmers. Pour it over the semisweet chocolate chips in a bowl. Let it sit for about 2 minutes, then stir until smooth and glossy. This rich chocolate topping is what dreams are made of, and it’s super easy to make!
Step 8: Fill the Cupcakes
Once the cupcakes are cool, cut a small hole in the center of each one. Fill these holes with the chilled pastry cream. This is where the magic happens! Each bite will reveal a luscious surprise that takes these cupcakes to the next level.
Step 9: Top with Ganache
Now, it’s time to dip or spoon the ganache over the filled cupcakes. Make sure to cover them generously; after all, who doesn’t love a good chocolate topping? The ganache will set beautifully, creating a stunning finish that’s sure to impress!
Step 10: Chill and Serve
Finally, chill the cupcakes in the refrigerator for about 20 minutes before serving. This helps the ganache firm up and makes for a perfect texture. When you’re ready to indulge, just grab one and enjoy the delightful layers of flavor!
